- Mar 11, 2022
- 862
- 115,453
- 2,518

This is just a guide that should make getting DRM content easier.
Yes there are already some guides. But I just want to make one that even a non tech-savvy could understand, follow and find.
This guide will go through the process of installing python and the needed tools to get DRM protected content
The guide will be split into multiple parts.
Mac OS users, please head to this guide: https://simpcity.su/threads/guide-for-getting-drm-content-wip.181199/post-2964404
First things first.
Download Python from this site: and get the latest version*. (Not the pre-release one)
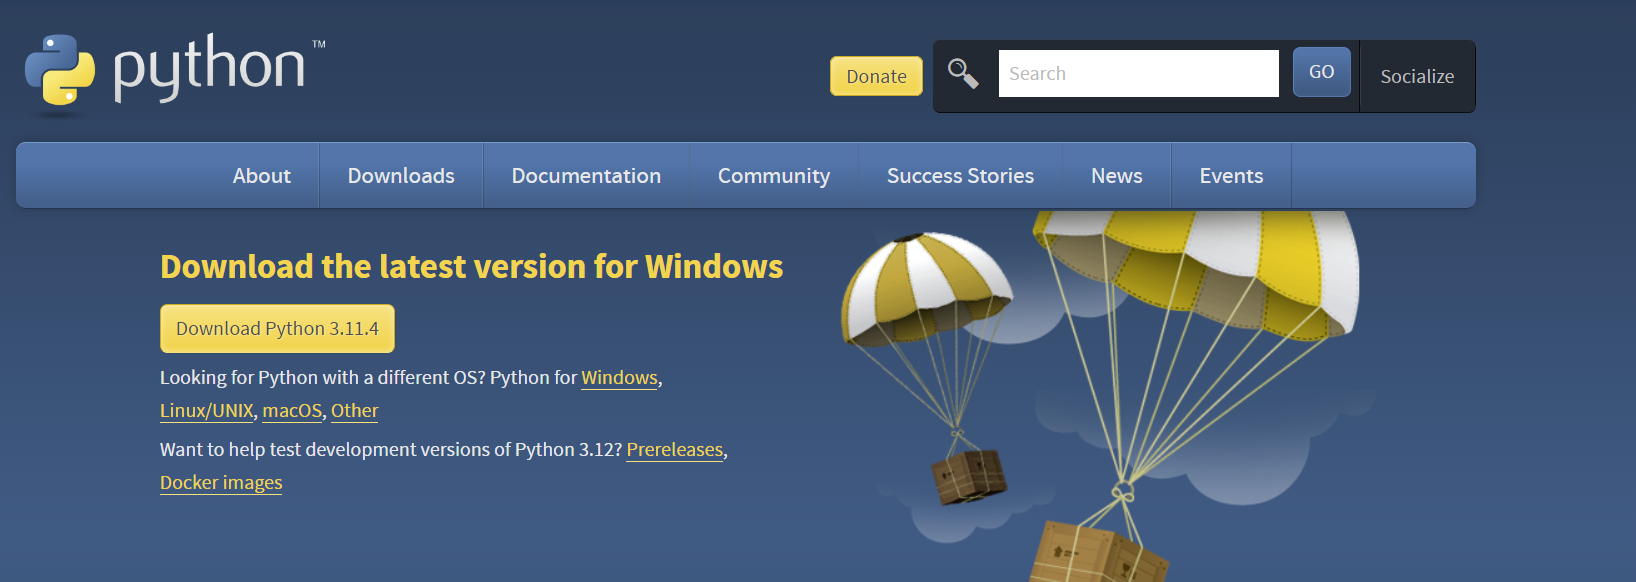
* The latest version of time of writing is 3.11.4
Open up the installer and make sure to press "Add python to PATH"
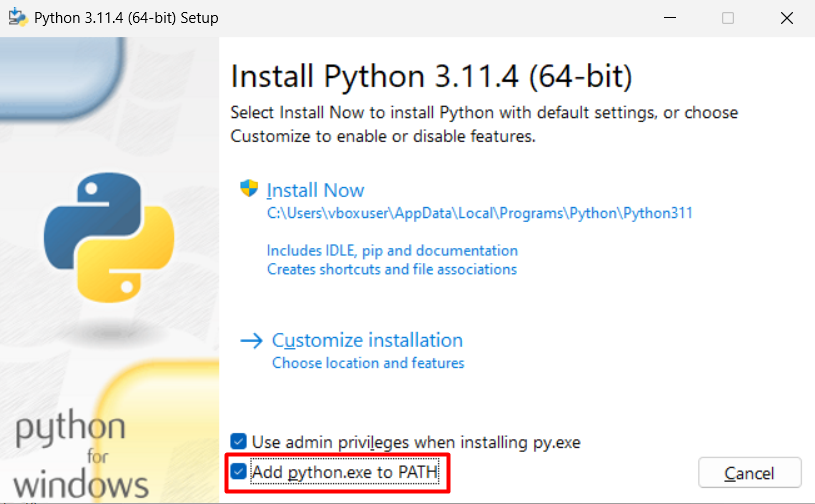
After selecting that option press install and wait till it's done.
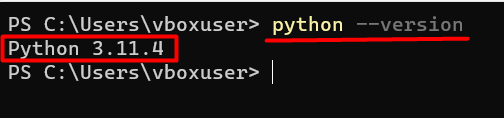
To make sure it is installed properly, open up Terminal (Windows 11) or Powershell (Windows 10/11) and type:
* Version my differ depending on what version is the latest version over time.
With the installation of Python comes the pip package. To check if its installed type in a Terminal or Powershell:

* Again version my differ over time.
To install frida head into a Terminal or Powershell and type:

* Versions can be different for you so double check.
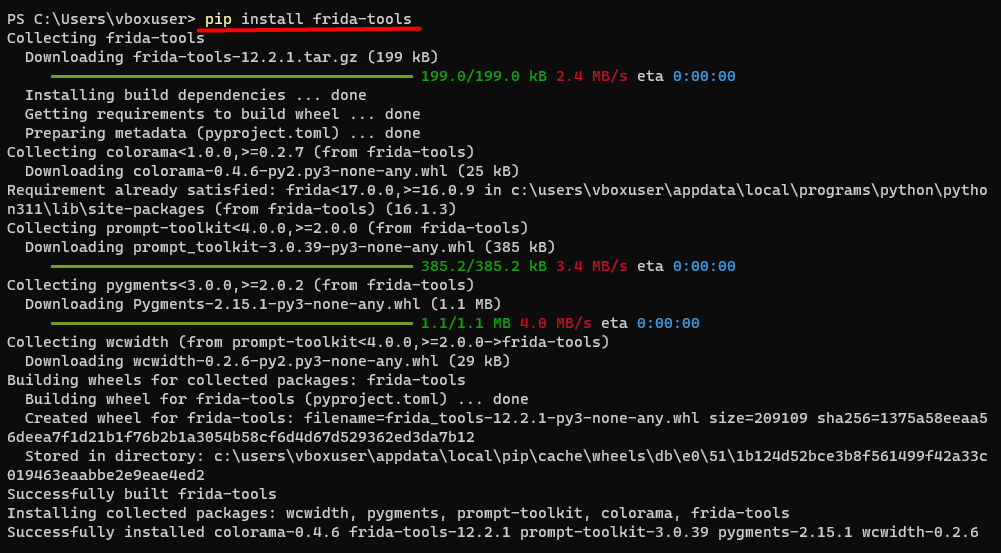
Then you need frida-tools which can be installed by typing in Terminal or Powershell:
Download Android Studio

And go through the setup of installing.
After installing open up Android Studio.
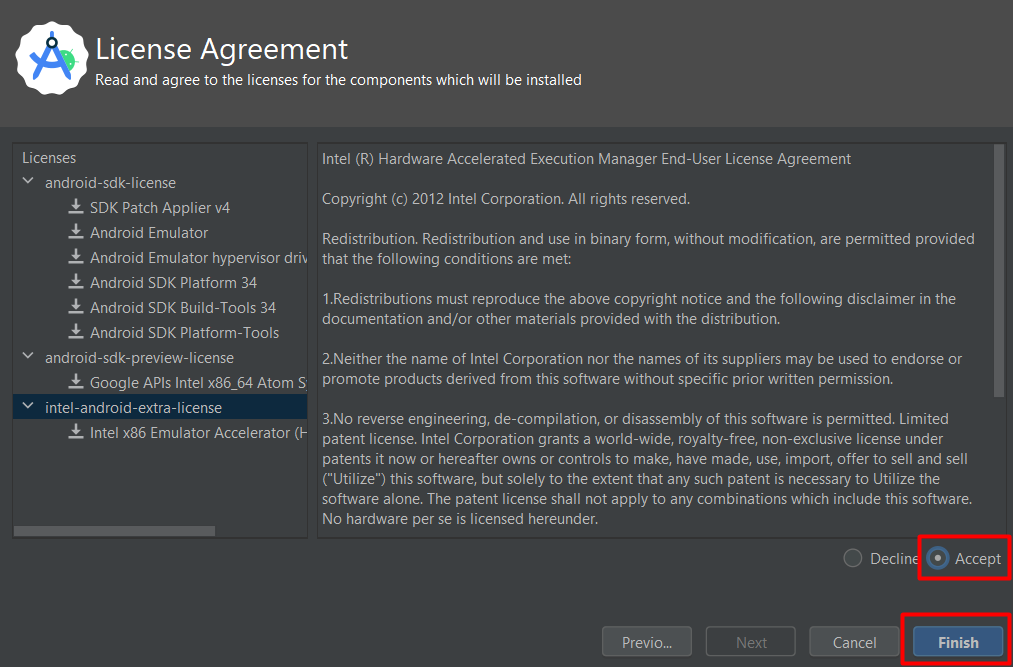
You can leave most settings on default. Then when it comes to the licenses click accept on all of them till the finish button gets highlighted.
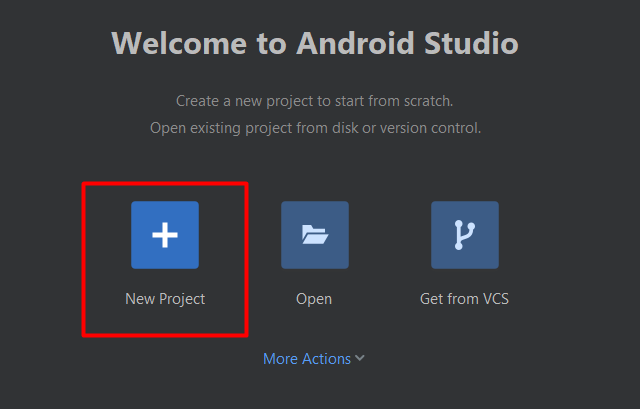
After the installation Android Studio will open and give you the option to "create a new project" like shown below:
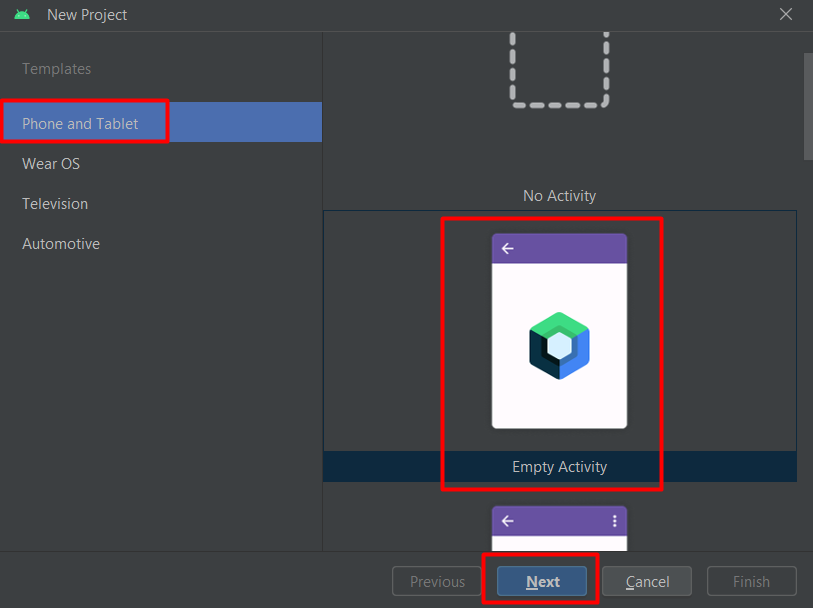
Then select "phone and tablet" with an "empty activity" and click on next, like shown in the image below:
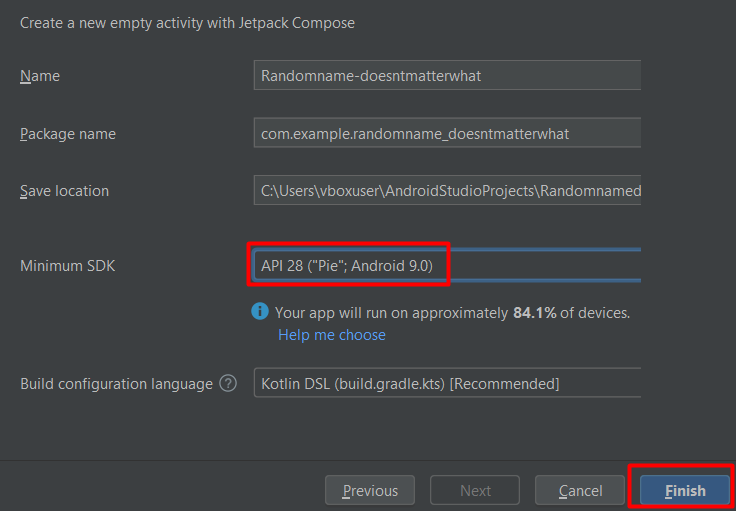
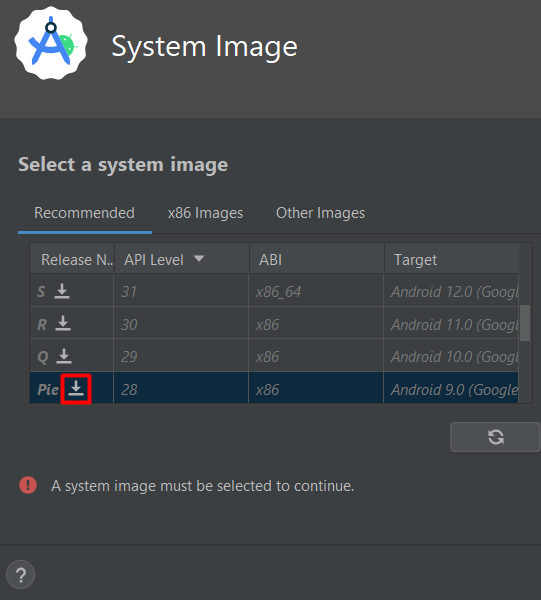
Next up select a minimum SDK of Android 9.0 (Pie) or above like shown below:
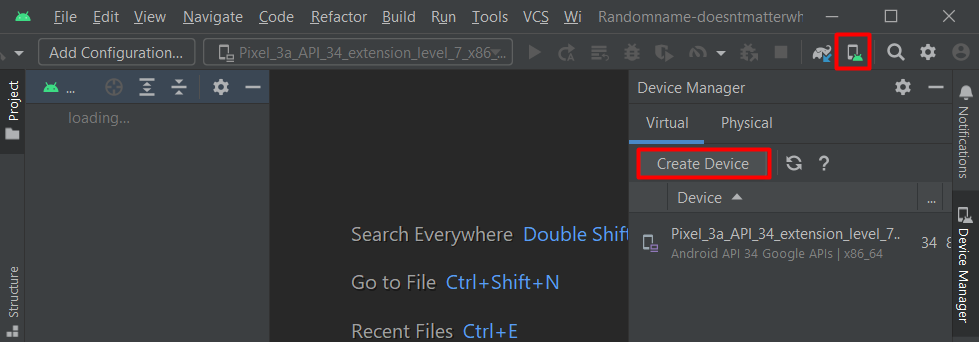
To create a new device you press the device manager button and click on "create device" like shown below:
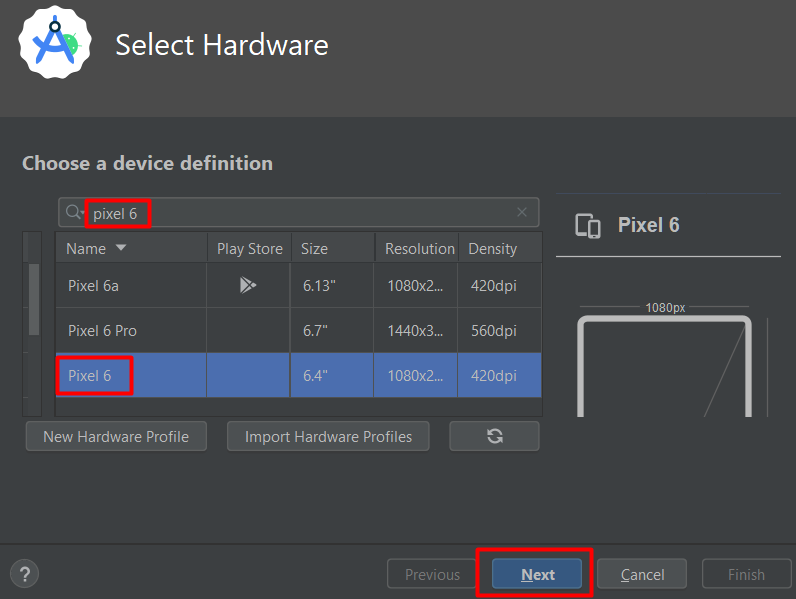
Search for the Pixel 6, select it and press next.
You will first need to download the OS, so press the download icon next to the version* you want. (*Choose Android 9.0 or newer.)
After its done downloading select the version again and press next and finish up the new device.
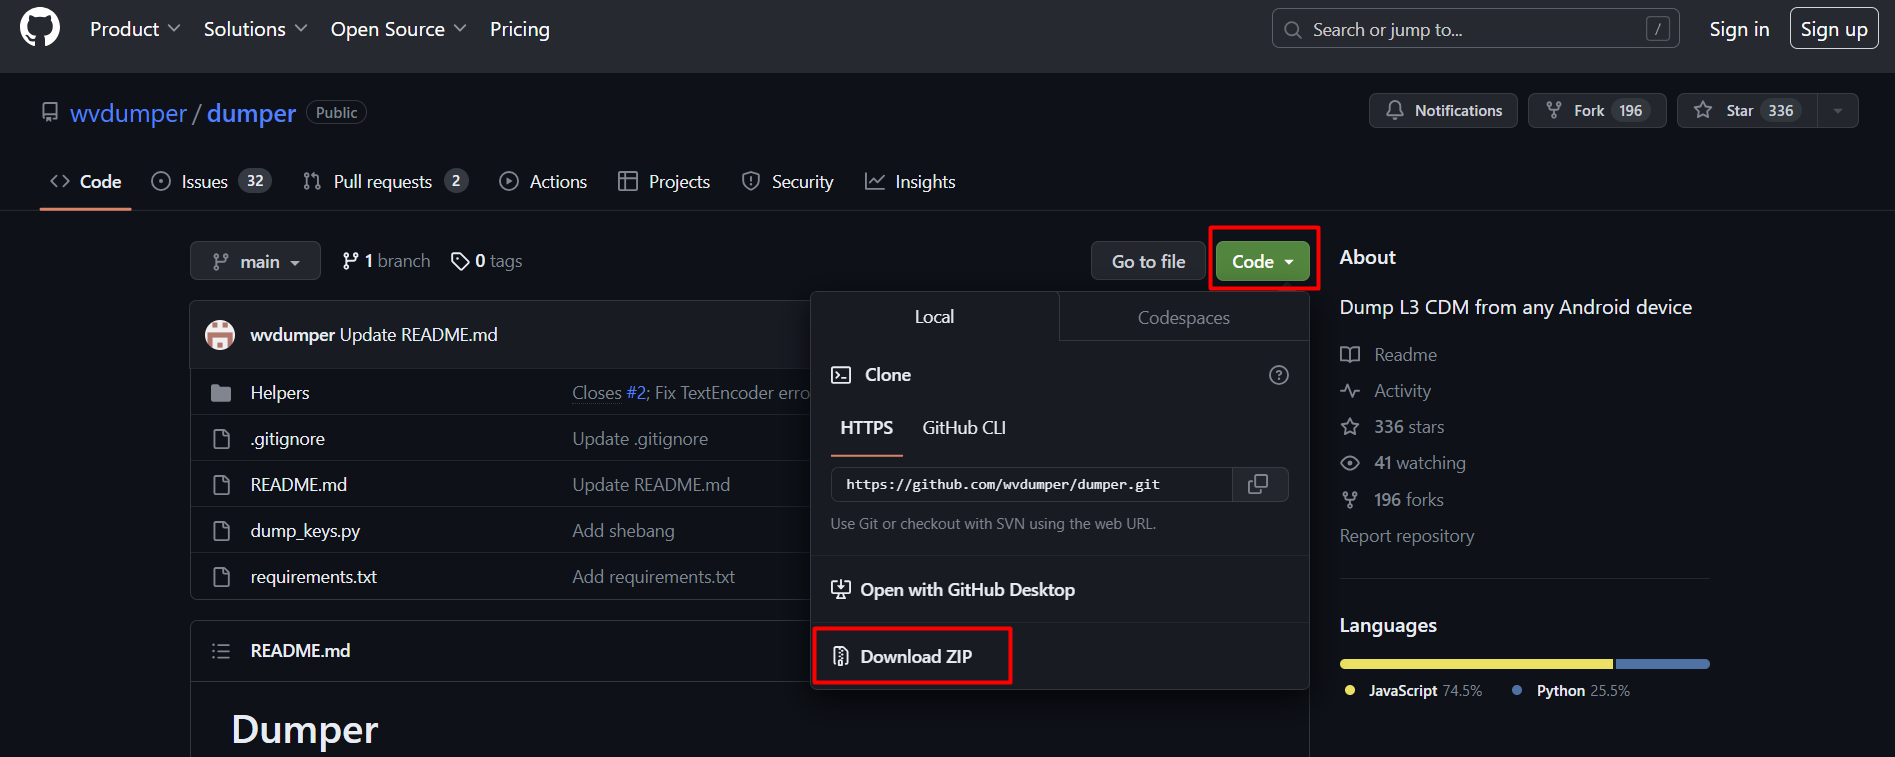
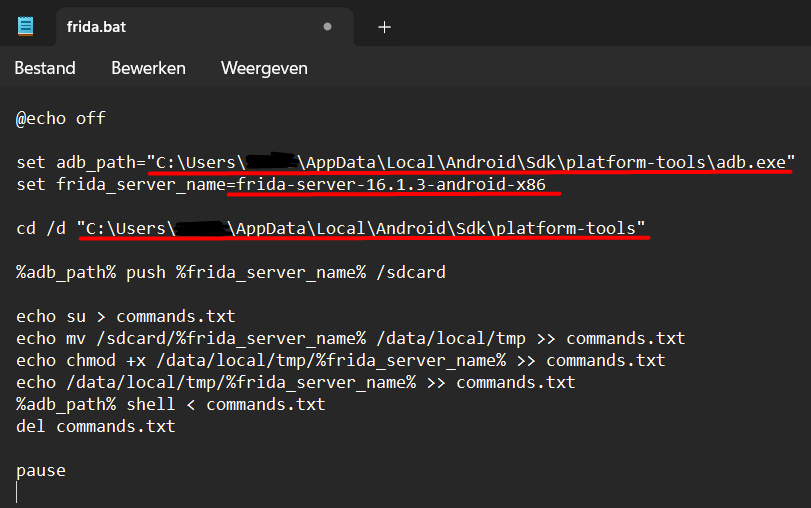
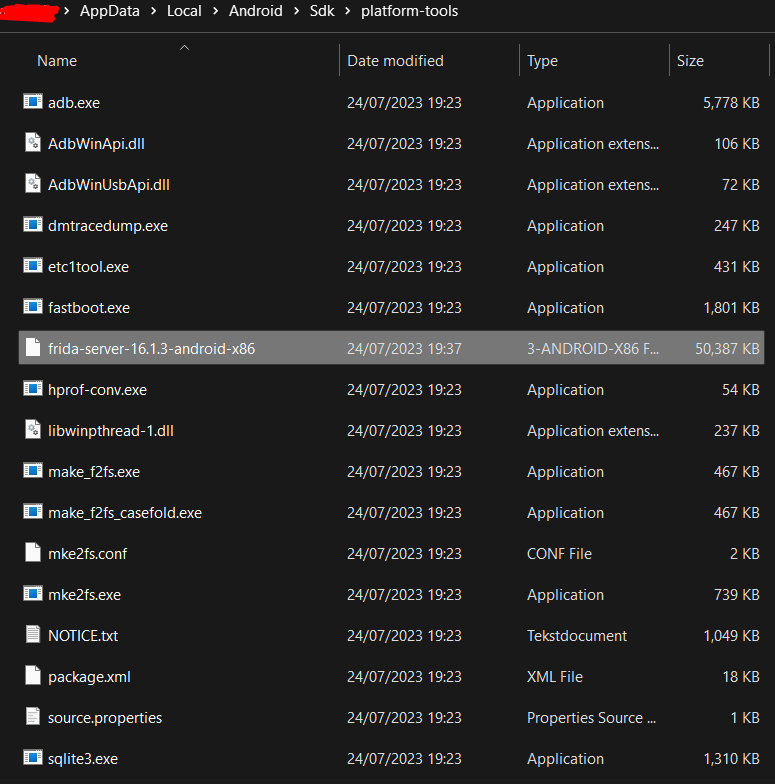
Next up is to install frida on your virtual phone. Download frida on your PC from here: and search for "frida-server" with the right version that was highlighted in yellow when you installed frida using pip, and make sure to pick the android-x86 version, like shown below:

Extract the downloaded file to the following location on your device:
--
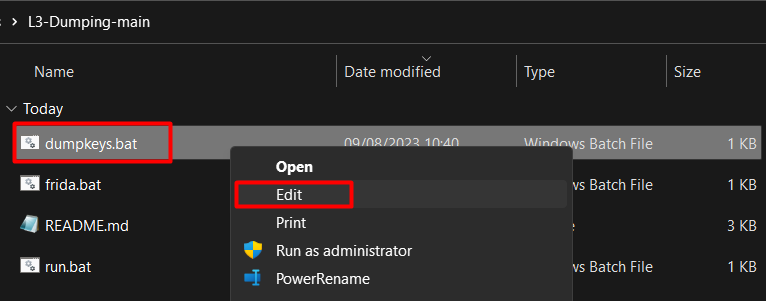
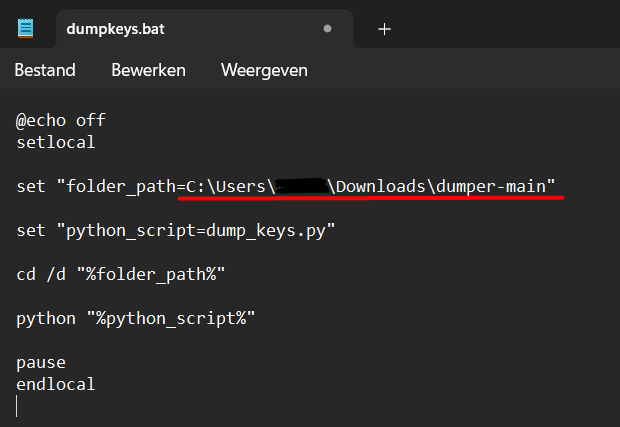
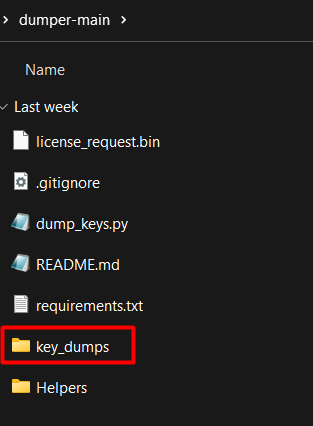
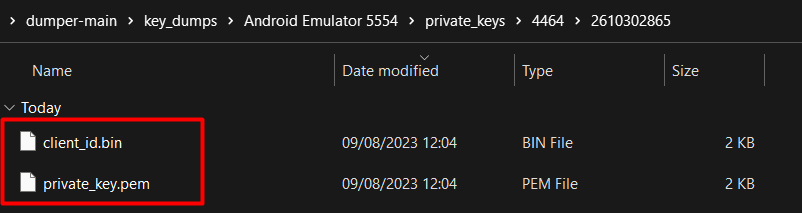
Choose one of the two methodes:
You are now ready to use the keys for the scraping tools.
(I'll make a guide to a few of those scrapers below, with again the intention of making it simple to understand and follow.)
In the meantime you can try it yourself by following the already existing guides from here:
https://simpcity.su/threads/onlyfans-downloading-a-complete-guide-for-pc-and-mobile.10208/
Yes there are already some guides. But I just want to make one that even a non tech-savvy could understand, follow and find.
This guide will go through the process of installing python and the needed tools to get DRM protected content
The guide will be split into multiple parts.
Mac OS users, please head to this guide: https://simpcity.su/threads/guide-for-getting-drm-content-wip.181199/post-2964404
Python, PIP and Frida installation
First things first.
Download Python from this site: and get the latest version*. (Not the pre-release one)
* The latest version of time of writing is 3.11.4
Open up the installer and make sure to press "Add python to PATH"
After selecting that option press install and wait till it's done.
To make sure it is installed properly, open up Terminal (Windows 11) or Powershell (Windows 10/11) and type:
That should give you the following result*
* Version my differ depending on what version is the latest version over time.
With the installation of Python comes the pip package. To check if its installed type in a Terminal or Powershell:
That should also give you the following result*
* Again version my differ over time.
To install frida head into a Terminal or Powershell and type:
Make sure to note somewhere what version got installed which is important later on. * (Version is marked in yellow)
* Versions can be different for you so double check.
Then you need frida-tools which can be installed by typing in Terminal or Powershell:
Android Studio installation and creating your first virtual phone
Download Android Studio
And go through the setup of installing.
After installing open up Android Studio.
You can leave most settings on default. Then when it comes to the licenses click accept on all of them till the finish button gets highlighted.
After the installation Android Studio will open and give you the option to "create a new project" like shown below:
Then select "phone and tablet" with an "empty activity" and click on next, like shown in the image below:
Next up select a minimum SDK of Android 9.0 (Pie) or above like shown below:
To create a new device you press the device manager button and click on "create device" like shown below:
Search for the Pixel 6, select it and press next.
You will first need to download the OS, so press the download icon next to the version* you want. (*Choose Android 9.0 or newer.)
After its done downloading select the version again and press next and finish up the new device.
Installing Frida-server on your virtual phone
Next up is to install frida on your virtual phone. Download frida on your PC from here: and search for "frida-server" with the right version that was highlighted in yellow when you installed frida using pip, and make sure to pick the android-x86 version, like shown below:
Extract the downloaded file to the following location on your device:
And have it sit there like this:
--
Choose one of the two methodes:
Automated method: https://simpcity.su/threads/guide-for-getting-drm-content-wip.181199/post-3091645
You are now ready to use the keys for the scraping tools.
(I'll make a guide to a few of those scrapers below, with again the intention of making it simple to understand and follow.)
In the meantime you can try it yourself by following the already existing guides from here:
https://simpcity.su/threads/onlyfans-downloading-a-complete-guide-for-pc-and-mobile.10208/
Last edited: