

DISCLAIMER: This guide is somewhat technical, there are probably cases / errors that are not included in this guide, and can cause you to waste time and effort without any success.
0. Introduction
This guide will provide steps to install Rope ( ) to create videos by face swapping a person's face onto another video.1. Requirements
This application works with both CPU and GPU setups.When using Windows, this guide requires Windows 10 1709 (build 16299) or later (incl. Windows 11).
While a Nvidia graphics card (GPU) is not required, it will make the swapping process much faster.
If you have a GPU, install Nvidia's and if you have not already installed these.
2. Installation
3. Preparation
3.1. Source (Celeb/Influencer)
First you have to decide with person you want to swap in to a video.Select some high quality pictures where the face is visible, and where the part of the face is not too small. E.g. full face image (+- 300-400px image height), half body image (+- 750 - 1024px image height), full body image (1024+px image height, best to avoid these). The higher quality / size, the better.
It's also best to select several pictures where the person is looking to the left, front and right. The model will "merge" the different faces to get optimal results. Even selecting pictures with the teeth visible, closed eyes, etc can improve the result a little bit.
3.1. Destination (Porn star)
This is the hardest part, finding a porn star that has a face that has the same "dimensions" / shape as the chosen person in the previous section.Using "Face Match" tools will not (always) work, since these will most of the time look at the face itself, and not the shape. YMMV
3.2. Target Video
Note: this method will give bad results if the video has frames with obstructions in front of the face.When selecting a video, it's best to cut/slice the video and remove unwanted / filler scenes, scenes with obstructions in front of the face, etc.
There's a lot of software that can slice / edit videos, some free/opensource options: , ,
This guide will not include how to edit videos with the above software, there are enough guides on that elsewhere.
It's also a good idea when editing the video, to transcode to 720p and 24 frames / second, this is improve the speed of the process and not waste resources. But that's up to you

4. UI
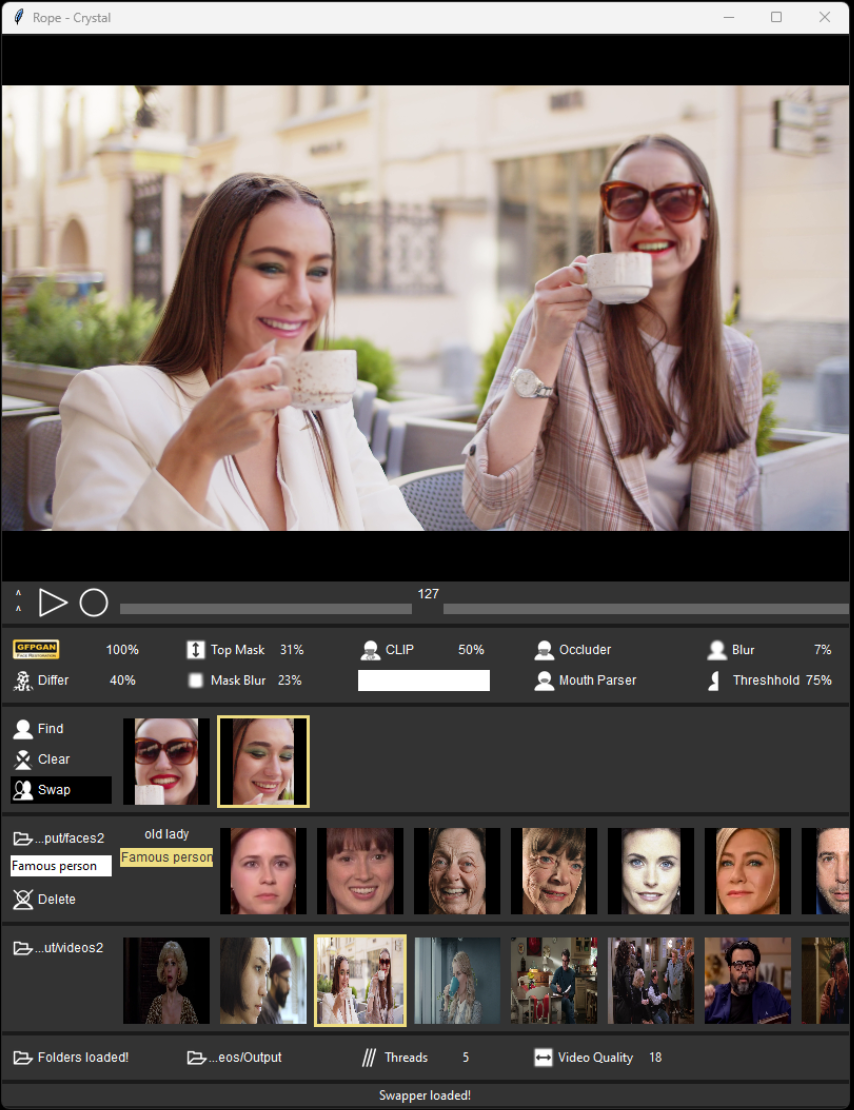
The UI has 3 "input" sections. From bottom to top:
- Video selection
- Source Faces
- Destination Face
5. Start
To start the process:- Select your Source Faces Folder
- Select your Target Videos Folder
- Select your Output Folder
- Click Load Folders
- Click on GFPGAN (used to improve / upscale the resulting face)
- All other settings are optional and can either improve or degrade the result. E.g. you can use CLIP with "hands, penis" in the input box or Occluder/Mouth Parser to improve the result when there are obstructions in front of the face. But it will never be 100%, there will be a lot of distortion, etc. Best solution is to avoid frames with obstructions.

- 1. Select a Target Video (mousewheel scroll the Target Videos)
- 2. Move to a video frame with faces in it and click Find
- 3. Select a found Target Faces (mousewheel scroll the Target Faces)
- 4. Select a Source Face (hold shift to select multiple Source Faces), (mousewheel scroll the Source Faces), (mousewheel scroll in the Video Player to iterate through the Source Faces)
- 5. Click Swap to test the swap
- 6. Move to the first frame in the video, click on the circle (Record) and then press the Play icon.
6. Additional Tips
- When asking for help, don't forget to add a screenshots of the console output if there are any errors
- Whenever you see 'OOM (Out of Memory)' in the console output, it most of the time means that you do not have enough system RAM or (graphics) VRAM to run it
- The mousewheel does not seem to work on Linux
Last edited: